星期五, 九月 29, 2006

wp的config分析 learn wordpress (9)

定义常量的方式
define('DB_NAME', 'wordpress_test');
定义变量的方式
$table_prefix = 'wp_';

数据库设置
DB_NAME DB_USER DB_PASSWORD DB_HOST
table_prefix

多语言设置
WPLANG

当前文件的绝对路径
define('ABSPATH', dirname(__FILE__).'/');
#PS:这个强烈建议去做,在一个预定的位置来记录路径,在以这个路径为基本进行路径组合。
省得当前文件在哪自己都不知道了,特别是在包含来包含去的时候。

从外部导入设置
require_once(ABSPATH.'wp-settings.php');
在wp-setting中对环境进行了一些设置 可以参看前面的几篇文章

wp-setting中进行不需要人为干预的环境初始化

星期四, 九月 28, 2006

学习wordpress的安装过程(一) learn wordpress(8)

tags: install,wordpress,learn
author: fallseir.lee
date:20060929
description:
分析 wordpress 的代码,分析其自动安装过程,从其内部压榨其可用之处。
=-------------------------------* 跟踪WP的安装 *----------------------------=
安装wordpress就不再重复了
现在我们来看下其文件加载过程

首先、通过 http://localhost/wordpress/ 来访问本地安装的wordpress
1、进入 index.php
在index.php中只是定义的一个默认的样式然后导入wp-blog-header.php文件
2、当加载 wp-blog-header.php 文件时
使用 file_exists 来判断 config.php 文件是否已经配置(存在) 通过dirname(__FILE__)来获取当前目录
使用 strstr 和 全局变量 $_SERVER['PHP_SELF'] 来自动匹配转向文件的位置
使用 die 结束任务并返回错误提示,提示用户到这里http://localhost/wordpress/wp-admin/setup-config.php 来安装配置文件。

其次、在setup-config.php中提示用户如何进行数据库连接配置
1、检测默认配置文件 file_exists('../wp-config-sample.php')
2、检测目录是否可写 is_writable('../')
3、根据外部参数状态进行自动参数填充 isset($_GET['step']) 如果没有设置则设置为默认值
4、根据 switch($step) 指定的向导位置,进行相应的处理
5、使用向导提示用户进行数据库参数设置
5.2、判断配置文件是否已经存在,防止自动覆盖已经存在的配置信息
6、$configFile = file('../wp-config-sample.php'); # 使用 file 提取出文件中的行列
7、设置数据库访问环境 并对数据库环境进行测试
define('DB_NAME', $dbname);
define('DB_USER', $uname);
define('DB_PASSWORD', $passwrd);
define('DB_HOST', $dbhost);
require_once('../wp-includes/wp-db.php'); # 导入数据库处理包,假定这个包有自动监测环紧的部分
8、将配置信息写入到配置文件
fopen('../wp-config.php', 'w'); # 写入配置文件
foreach ($configFile as $line_num => $line) { # 按行读取配置信息
switch (substr($line,0,16)) { # 通过前16字进行配置信息匹配
case "define('DB_NAME'": # 如果包含指定的标识
fwrite($handle, str_replace("wordpress", $dbname, $line)); # 使用对应的新数据进行写入
break;
...
default:
fwrite($handle, $line); # 没有匹配的信息原样写入
fclose($handle); # 关闭文件句柄
chmod('../wp-config.php', 0666); # 修改文件访问模式
配置文件更新成功后提示用户进入安装向导 install.php

然后、开始安装数据库 install.php
1、定义开始安装标记 define('WP_INSTALLING', true);
2、检测 wp-config.php 并加载
3、加载 './upgrade-functions.php' 对上一版数据进行升级(暂时理解为)
4、记录协议名支持可能的https
$schema = ( isset($_SERVER['HTTPS']) && strtolower($_SERVER['HTTPS']) == 'on' ) ? 'https://' : 'http://';
5、组合全路径(PS:将step=2清除了,暂时还不明白为什么)
$guessurl = str_replace('/wp-admin/install.php?step=2', '', $schema . $_SERVER['HTTP_HOST'] . dirname($_SERVER['PHP_SELF']) );
6、设定http头信息
header( 'Content-Type: text/html; charset=utf-8' ); # 指定处理类型和编码
7、内部统一输出方式
_e('WordPress › Installation'); #将所有的程序输出加壳,以便可以进行统一的处理,比如多语言支持。
8、检测数据是否已经安装
$wpdb->hide_errors(); # 关闭错误输出,在检测时允许出现表不存在的异常
$installed = $wpdb->get_results("SELECT * FROM $wpdb->users"); # 执行sql
if ($installed) die('
'.__('Already Installed').'

'.__('You appear to have already installed WordPress. To reinstall please clear your old database tables first.').'
'); # 使用 __() 封装文字数据获取方式,提供对多语言的支持
$wpdb->show_errors(); # 开启错误输出
9、使用 flush 将一部分数据先送到客户端,让用户最快的看到信息减少用户的等待时间
flush();
将内部的缓存全部送出
// Set everything up
wp_cache_flush();
10、PS:一些不认识的标记
make_db_current_silent();
populate_options();
populate_roles();
11、对经常使用的更新操作进行封装
update_option('blogname', $weblog_title);
update_option('admin_email', $admin_email);
12、设置一些默认数据
// Now drop in some default links
$wpdb->query("INSERT INTO $wpdb->linkcategories (cat_id, cat_name) VALUES (1, '".$wpdb->escape(__('Blogroll'))."')");
$wpdb->query("INSERT INTO $wpdb->links (link_url, link_name, link_category, link_rss, link_notes) VALUES ('http://blogs.linux.ie/xeer/', 'Donncha', 1, 'http://blogs.linux.ie/xeer/feed/', '');");
...
// Default category
$wpdb->query("INSERT INTO $wpdb->categories (cat_ID, cat_name, category_nicename, category_count, category_description) VALUES ('0', '".$wpdb->escape(__('Uncategorized'))."', '".sanitize_title(__('Uncategorized'))."', '1', '')");
// First post
$now = date('Y-m-d H:i:s');
$now_gmt = gmdate('Y-m-d H:i:s');
$wpdb->query("INSERT INTO $wpdb->posts (post_author, post_date, post_date_gmt, post_content, post_excerpt, post_title, post_category, post_name, post_modified, post_modified_gmt, comment_count, to_ping, pinged, post_content_filtered) VALUES ('1', '$now', '$now_gmt', '".$wpdb->escape(__('Welcome to WordPress. This is your first post. Edit or delete it, then start blogging!'))."', '', '".$wpdb->escape(__('Hello world!'))."', '0', '".$wpdb->escape(__('hello-world'))."', '$now', '$now_gmt', '1', '', '', '')");

$wpdb->query( "INSERT INTO $wpdb->post2cat (`rel_id`, `post_id`, `category_id`) VALUES (1, 1, 1)" );

// Default comment
$wpdb->query("INSERT INTO $wpdb->comments (comment_post_ID, comment_author, comment_author_email, comment_author_url, comment_date, comment_date_gmt, comment_content) VALUES ('1', '".$wpdb->escape(__('Mr WordPress'))."', '', 'http://wordpress.org/', '$now', '$now_gmt', '".$wpdb->escape(__('Hi, this is a comment.
To delete a comment, just log in, and view the posts\' comments, there you will have the option to edit or delete them.'))."')");
// First Page

$wpdb->query("INSERT INTO $wpdb->posts (post_author, post_date, post_date_gmt, post_content, post_excerpt, post_title, post_category, post_name, post_modified, post_modified_gmt, post_status, to_ping, pinged, post_content_filtered) VALUES ('1', '$now', '$now_gmt', '".$wpdb->escape(__('This is an example of a WordPress page, you could edit this to put information about yourself or your site so readers know where you are coming from. You can create as many pages like this one or sub-pages as you like and manage all of your content inside of WordPress.'))."', '', '".$wpdb->escape(__('About'))."', '0', '".$wpdb->escape(__('about'))."', '$now', '$now_gmt', 'static', '', '', '')");

# PS:从上面的代码可以看书 wp 将数据库操作 都封装到了wpdb对象中,包括可能批量变化的表名,和一些辅助操作$wpdb->escape
13、PS:未知操作
$wp_rewrite->flush_rules();
14、设置管理员信息

// Set up admin user
$random_password = substr(md5(uniqid(microtime())), 0, 6);
# PS:使用md5来生成随机密码呵呵有意思
# 获取email中的用户名
$display_name_array = explode('@', $admin_email); # 不过我经常是使用split来切片一个字符串
$display_name = $display_name_array[0];

# 插入用户
$wpdb->query("INSERT INTO $wpdb->users (ID, user_login, user_pass, user_email, user_registered, display_name, user_nicename) VALUES ( '1', 'admin', MD5('$random_password'), '$admin_email', NOW(), '$display_name', 'admin')");

# PS:$wpdb->insert_id 应该是上一条sql出来的吧
# PS:这个level应该使用来排序的权值吧
$wpdb->query("INSERT INTO $wpdb->usermeta (user_id, meta_key, meta_value) VALUES ({$wpdb->insert_id}, '{$table_prefix}user_level', '10');");
# 将权限列表存储 使用php自己的序列化
$admin_caps = serialize(array('administrator' => true));
$wpdb->query("INSERT INTO $wpdb->usermeta (user_id, meta_key, meta_value) VALUES ({$wpdb->insert_id}, '{$table_prefix}capabilities', '{$admin_caps}');");

# 构建mail
$message_headers = 'From: ' . $weblog_title . ' ';
# 使用 sprintf 对模版进行填充
$message = sprintf(__("Your new WordPress blog has been successfully set up at:

%1\$s

You can log in to the administrator account with the following information:

Username: admin
Password: %2\$s

We hope you enjoy your new weblog. Thanks!

--The WordPress Team
http://wordpress.org/
"), $guessurl, $random_password);
# 原来 guessurl 用在这里,在mail中当然不能使用相对路径

# 发送mail
# PS:但是我的 mail 不可用 也许是我配置错了吧 不过我没有设置过阿
@wp_mail($admin_email, __('New WordPress Blog'), $message, $message_headers);

15、PS:又一次清空缓存 而且和前两次用到的不同
wp_cache_flush();
=-------------------------------* PS:终于跟到安装结束了 *----------------------------=
PS:顺了一遍安装的流程,让我们回顾下有什么东西可以留在脑子里

wp的index.php只有两句
/* Short and sweet */ # 短而美妙的
define('WP_USE_THEMES', true);
require('./wp-blog-header.php');
这里的define应该是引导用户可以在这里进行一些全局的设置,在 config 加载之前
这句 require 才是大头,它将所有的处理都封装了
看他的命名
WP_USE_THEMES
前缀wp使用简写
每个单词使用下划线间隔
常量大写
PS:比较常见的命名方式,使用wp前缀应该是给用户最大的可能不出现重名,还可以和其他的插件进行友好的兼容 用户不必再编写插件或进行扩展时需要查看所有可能用到的页面来判断是否会出现命名重复。
wp-blog-header.php
可以看到这个是wordpress的blog的头信息,也可以理解为在处理开始的部分。
这个header好像处理的东西也不多
首先使用$wp_did_header进行重复加载过滤
然后加载config数据
进行预处理
wp(); # 理解为初始化环境
gzip_compression(); # 进行压缩处理
# 加载样式模版
require_once(ABSPATH . WPINC . '/template-loader.php');

PS:今天先到这,没有外链了,我去写篇wp的config分析
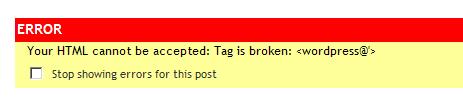
UPDATE:本来加了颜色和样式的 但是发布时竟然出现
郁闷啊 我把样式清除了才可以发布 !!

code:哈希和循环 (perl snippet)

perl 脚本记录
哈希和循环
$ perl -e '
($t1,$t2) = split ":","test:test2:test3",2; # 使用split进行字符串的切片操作 按:将字符串切片成长度为2的数组并分别符值给$t1和$t2
$t={"1"=>$t1,"2"=>$t2}; # 使用$t1和$t2的值构建哈希表
for $k (keys %{$t}){ # 输出%t中的每一个值
print "$k $t->{$k}\n"
};
'
1 test
2 test2:test3

shell:date 常用方式

在linux下获取时间字符串
命令 date
# 以yyyymmdd格式输出23天之前现在这个时刻的时间
$ date +%Y%m%d --date='23 days ago'

$ date -u
Thu Sep 28 09:32:04 UTC 2006

$ date -R
Thu, 28 Sep 2006 17:32:28 +0800

# 测试十亿分之一秒
$ date +'%Y%m%d %H:%M:%S.%N';date +'%Y%m%d %H:%M:%S.%N';date +'%Y%m%d %H:%M:%S.%N';date +'%Y%m%d %H:%M:%S.%N'
20060928 17:44:20.906805000
20060928 17:44:20.909188000
20060928 17:44:20.911535000
20060928 17:44:20.913886000


date 参考
$ date --help
Usage: date [OPTION]... [+FORMAT]
or: date [-u|--utc|--universal] [MMDDhhmm[[CC]YY][.ss]]
Display the current time in the given FORMAT, or set the system date.

-d, --date=STRING display time described by STRING, not `now'
# such as 'n days ago |1 month ago|n years ago'
-f, --file=DATEFILE like --date once for each line of DATEFILE
-ITIMESPEC, --iso-8601[=TIMESPEC] output date/time in ISO 8601 format.
TIMESPEC=`date' for date only,
`hours', `minutes', or `seconds' for date and
time to the indicated precision.
--iso-8601 without TIMESPEC defaults to `date'.
-r, --reference=FILE display the last modification time of FILE
-R, --rfc-2822 output RFC-2822 compliant date string
-s, --set=STRING set time described by STRING
-u, --utc, --universal print or set Coordinated Universal Time
--help display this help and exit
--version output version information and exit

FORMAT controls the output. The only valid option for the second form
specifies Coordinated Universal Time. Interpreted sequences are:

%% 输出%符号 a literal %
%a 当前域的星期缩写 locale's abbreviated weekday name (Sun..Sat)
%A 当前域的星期全写 locale's full weekday name, variable length (Sunday..Saturday)
%b 当前域的月份缩写 locale's abbreviated month name (Jan..Dec)
%B 当前域的月份全称 locale's full month name, variable length (January..December)
%c 当前域的默认时间格式 locale's date and time (Sat Nov 04 12:02:33 EST 1989)
%C n百年 century (year divided by 100 and truncated to an integer) [00-99]
%d 两位的天 day of month (01..31)
%D 短时间格式 date (mm/dd/yy)
%e 短格式天 day of month, blank padded ( 1..31)
%F 文件时间格式 same as %Y-%m-%d
%g the 2-digit year corresponding to the %V week number
%G the 4-digit year corresponding to the %V week number
%h same as %b
%H 24小时制的小时 hour (00..23)
%I 12小时制的小时 hour (01..12)
%j 一年中的第几天 day of year (001..366)
%k 短格式24小时制的小时 hour ( 0..23)
%l 短格式12小时制的小时 hour ( 1..12)
%m 双位月份 month (01..12)
%M 双位分钟 minute (00..59)
%n 换行 a newline
%N 十亿分之一秒 nanoseconds (000000000..999999999)
%p 大写的当前域的上下午指示 locale's upper case AM or PM indicator (blank in many locales)
%P 小写的当前域的上下午指示 locale's lower case am or pm indicator (blank in many locales)
%r 12小时制的时间表示(时:分:秒,双位) time, 12-hour (hh:mm:ss [AP]M)
%R 24小时制的时间表示 (时:分,双位)time, 24-hour (hh:mm)
%s 自基础时间 1970-01-01 00:00:00 到当前时刻的秒数 seconds since `00:00:00 1970-01-01 UTC' (a GNU extension)
%S 双位秒 second (00..60); the 60 is necessary to accommodate a leap second
%t 横向制表位(tab) a horizontal tab
%T 24小时制时间表示 time, 24-hour (hh:mm:ss)
%u 数字表示的星期(从星期一开始 1-7)day of week (1..7); 1 represents Monday
%U 一年中的第几周星期天为开始 week number of year with Sunday as first day of week (00..53)
%V 一年中的第几周星期一为开始 week number of year with Monday as first day of week (01..53)
%w 一周中的第几天 星期天为开始 0-6 day of week (0..6); 0 represents Sunday
%W 一年中的第几周星期一为开始 week number of year with Monday as first day of week (00..53)
%x 本地日期格式 locale's date representation (mm/dd/yy)
%X 本地时间格式 locale's time representation (%H:%M:%S)
%y 两位的年 last two digits of year (00..99)
%Y 年 year (1970...)
%z RFC-2822 标准时间格式表示的域 RFC-2822 style numeric timezone (-0500) (a nonstandard extension)
%Z 时间域 time zone (e.g., EDT), or nothing if no time zone is determinable

By default, date pads numeric fields with zeroes. GNU date recognizes
the following modifiers between `%' and a numeric directive.

`-' (hyphen) do not pad the field
`_' (underscore) pad the field with spaces

Report bugs to .

星期三, 九月 27, 2006

检测是否包含了指定的扩展包 learn wordpress (7)

检测是否包含了指定的扩展包
if ( !extension_loaded('mysql') )
{
header( 'Content-Type: text/html; charset=utf-8' );
die( '您的 PHP 好像并没有安装 MySQL 扩展,而 WordPress 需要它。' );
}
-- wp-settings.php
检测是否加载了某些需要的模块
参考 [http://cn.php.net/manual/zh/function.extension-loaded.php]


if (!extension_loaded('gd')) { # 检测是否加载了 gd 包
if (!
dl('gd.so')) { # 尝试通过默认路径加载 gd.so 包
exit; # 如果加载失败
}
}
$ php -m # 查看当前安装的扩展包
[PHP Modules]
xml
tokenizer
standard
sockets
session
posix
pcre
overload
mysql
mbstring
ctype
如果使用了一些不常用的扩展 最好在开始使用之前对当前的环境进行检测
防止,在使用时出现未定义的异常
不过尝试自动加载之前最好通知用户 以便出现一些兼容问题(虽然这种机率很小,:-))。

检测PHP版本 learn wordpress (6)

检测PHP版本
if ( !(phpversion() >= '4.1') )
{
header( 'Content-Type: text/html; charset=utf-8' );
die( '您的服务器正在运行 PHP 版本 ' . phpversion() . ',但是 WordPress 需要最小 4.1 版本。' );
}
-- wp-settings.php
检测当前使用的PHP的版本号,以防止因版本过低而产生的异常

这里可以看到phpversion的参考
[http://cn.php.net/manual/zh/function.version-compare.php]

// prints -1
echo version_compare("4.0.4", "4.0.6");

// these all print 1
echo version_compare("4.0.4", "4.0.6", "<");
echo
version_compare("4.0.6", "4.0.6", "eq");
?>

上面的例子基本上一看就懂了,使用version_compare 可以对 "." 间隔的数据进行比较
使用 phpversion 可以获取当前使用的 php 的版本号
建议在自己写的 php 页上使用 "." 分割的 version 并在被包含时使用 version_compare 进行版本比较,以便可以检测到一些不容易发现的遗留问题

在 修改 时,加上简要的更新内容说明也是一个很明智的方法。
:)

摘录一段 php.net 上的代码 ,绿色的是我加的一点注释,仅供参考 ;)

mina86 at tlen dot pl
01-Jul-2004 10:40
Here's a wrapper which is more tolerant as far as order of arguments is considered:

/**

* php 版本比较
* ver_cmp($version1,$compare,$version2);
* ver_cmp($compare,$version2);
* ver_cmp($version2);
*/
function ver_cmp($arg1, $arg2 = null, $arg3 = null) {
# 用于缓存 如果获取了一次 phpversion 就不必要再一次获取它了
static
$phpversion = null;
if (
$phpversion===null) $phpversion = phpversion(); #记录phpversion

# 根据实际调用的参数个数来判断执行什么操作
switch (
func_num_args()) {

# 比较输入的version2和当前的phpversion
case
1: return version_compare($phpversion, $arg1);

# 根据输入的操作方式对version2和phpversion进行比较
case
2:
# 自动适应操作符位置 操作符 $
compare 和 $version2 可以互换位置
# 如果没有找到操作符 则对 $version1 和 $version2 进行默认比较操作
if (preg_match('/^[lg][te]|[<>]=?|[!=]?=|eq|ne|<>$/i', $arg1))
return
version_compare($phpversion, $arg2, $arg1);
elseif (
preg_match('/^[lg][te]|[<>]=?|[!=]?=|eq|ne|<>$/i', $arg2))
return
version_compare($phpversion, $arg1, $arg2);
return
version_compare($arg1, $arg2);
default:
$ver1 = $arg1;
# 这句貌似没有什么用
# 自动适应操作符位置 允许操作符在第二个或第三个参数
if (
preg_match('/^[lg][te]|[<>]=?|[!=]?=|eq|ne|<>$/i', $arg2))
return
version_compare($arg1, $arg3, $arg2);
return
version_compare($arg1, $arg2, $arg3);
}
}


It also uses phpversion() as a default version if only one string is present. It can make your code look nicer 'cuz you can now write:
if (ver_cmp($version1, '>=', $version2)) something;
and to check a version string against the PHP's version you might use:
if (ver_cmp('>=', $version)) something;
instead of using phpversion().

对外界环境进行兼容设置 learn wordpress (5)

对外界环境进行兼容设置

// Fix for IIS, which doesn't set REQUEST_URI
# 如果没有设定 REQUEST_URI 则根据其他参数进行设定 REQUEST_URI="SCRIPT_NAME?QUERY_STRING";
if ( empty( $_SERVER['REQUEST_URI'] ) ) {
$_SERVER['REQUEST_URI'] = $_SERVER['SCRIPT_NAME']; // Does this work under CGI?

// Append the query string if it exists and isn't null
if (isset($_SERVER['QUERY_STRING']) && !empty($_SERVER['QUERY_STRING'])) {
$_SERVER['REQUEST_URI'] .= '?' . $_SERVER['QUERY_STRING'];
}
}

// Fix for PHP as CGI hosts that set SCRIPT_FILENAME to something ending in php.cgi for all requests
# 如果是通过CGI来处理的则将SCRIPT_FILENAME重定义为最终的处理文件 SCRIPT_FILENAME="PATH_TRANSLATED";

if ( isset($_SERVER['SCRIPT_FILENAME']) && ( strpos($_SERVER['SCRIPT_FILENAME'], 'php.cgi') == strlen($_SERVER['SCRIPT_FILENAME']) - 7 ) )
$_SERVER['SCRIPT_FILENAME'] = $_SERVER['PATH_TRANSLATED'];

// Fix for Dreamhost and other PHP as CGI hosts
if ( strstr( $_SERVER['SCRIPT_NAME'], 'php.cgi' ) )
unset($_SERVER['PATH_INFO']);

// Fix empty PHP_SELF
# 构建PHP_SELF
$PHP_SELF = $_SERVER['PHP_SELF'];
if ( empty($PHP_SELF) )
$_SERVER['PHP_SELF'] = $PHP_SELF = preg_replace("/(\?.*)?$/",'',$_SERVER["REQUEST_URI"]);

-- wp-settings.php
其实所谓兼容就是不同的外部环境给定的变量有些差异。
这些我没有用过姑且留之。

think:如何才能进行分布式计算

遇到些问题需要去解决 ,不了解这方面的情况,谁能告诉我从何下手。
一个web服务,
需要对其进行分布式优化
需求如下:
前端web服务分布进行负载均衡,
中间的数据层分布进行大数据存储和备份,
底层计算分布进行分布式计算。
非即时处理 可以使用异步的方式进行计算


上图是一份数据流的节点图
设想是
1、外部请求通过 Web Main 使用一定的规则进行分流 将请求定位到 web 1 ... web n 上;
2、web 1-n 向 Data Main 索要数据,并最终从 Data 1-n 上获取需要的数据;
3、 Worker Main 为 worker 1-n 分配任务,worker 1-n 自动执行任务,并将数据更新到需要的 data 节点上。

上图:一次处理的数据流
1、处理请求通过 web 1-n 进入系统;
2、web 1-n 将任务提交给 Data Main;
3、worker main 检测到未处理任务,并进行分割提交给 worker 1-n ;
4、worker 1-n 将根据任务进行处理(应该加一个 worker 会将将处理后的结果合并);
5、worker 1-n 通过 Data Main 对数据进行更新;
6、web 1-n 定期通知 web main 检测任务完成状态,直到任务过期或完成。

星期二, 九月 26, 2006

对指定的参数赋与初值 learn wordpress (4)

对指定的参数付与初值
if ( ! isset($blog_id) )
$blog_id = 1;
-- wp-settings.php
处理过程中的常用手段,预留一些设置变量,可以在类似config的文件中进行定义,来改变处理的方式。

留下一些可以定义的值给前边的任务。就像方法的默认值一样,如果你设置了其他的值,我就按照你指定的方式来处理,如果没有设置,我就按预定的默认方式处理。
可以用在include之前对包含进来的内容进行定制。

确保即将使用的变量被重置 learn wordpress (three)

确保即将使用的变量被重置
unset( $wp_filter, $cache_userdata, $cache_lastcommentmodified, $cache_lastpostdate, $cache_settings, $category_cache, $cache_categories );
-- wp-settings.php
# 清除需要用到的变量,确保不会因为环境(上下文)对后面将要执行的代码产生影响.

如果页面可能被重复加载,或者不确定这个页面会在什么时候被加载
那么我们应该尽可能的为下面的工作清出一块干净的空间,否则,谁也不确定你要的变量会在什么时候携带了一个你不想要的值。(当然,出现这个问题的一部分原因是因为我们使用的变量可能会重名,被重复使用)

清除自动创建的变量 learn wordpress (two)

清除自动创建的变量
// Turn register globals off
function unregister_GLOBALS() {
if ( !ini_get('register_globals') ) # 如果定义的全局变量
return;

if ( isset($_REQUEST['GLOBALS']) )
die('GLOBALS overwrite attempt detected');

// Variables that shouldn't be unset
$noUnset = array('GLOBALS', '_GET', '_POST', '_COOKIE', '_REQUEST', '_SERVER', '_ENV', '_FILES', 'table_prefix');

$input = array_merge($_GET, $_POST, $_COOKIE, $_SERVER, $_ENV, $_FILES, isset($_SESSION) && is_array($_SESSION) ? $_SESSION : array());
foreach ( $input as $k => $v )
if ( !in_array($k, $noUnset) && isset($GLOBALS[$k]) )
unset($GLOBALS[$k]); # 从GLOBALS中清除Request中设定的变量
}
-- wp-settings.php

# 如果指定了自动注册全局变量(register_globals)则清除所有从请求($input)过来的非保留($noUnset)的全局变量(in $GLOBALS).
Global 变量:$GLOBALS
注: $GLOBALS 在 PHP 3.0.0 及以后版本中适用。
由所有已定义全局变量组成的数组。变量名就是该数组的索引。
这是一个“superglobal”,或者可以描述为自动全局变量。这只不过意味这它在所有的脚本中都有效。在函数或方法中不需要使用 global $GLOBALS; 来访问它。
-- 来自《php手册》 http://cn.php.net/manual/zh/reserved.variables.php

防止重复加载同一部分代码 learn wordpress (one)

将writely上的学习笔记copy到这里
note in writely http://www.writely.com/View.aspx?docid=dg4t629m_37gnpq8t
然后使用这里的tag功能进行索引
ok! 开始我的php代码收集之路。

技巧 一 防止重复加载同一部分代码

if (! isset($wp_did_header)):
...
$wp_did_header = true;
...
endif;
-- wp-blog-header.php
## 类似的
if(defined('CBC.TOP_INC_SIGN')) return 1;
if(!defined('COMMON_INC_SIGN')){
die (__FILE__." LINE ".__LINE__.":require common.inc!\n");
return -1;
}
define("CBC.OPERATOR_INC_SIGN",1);
define("CBC.OPERATOR_VERSION","0.0.1");
-- 我的程序的一段代码

考虑页面可能被多次引用的情况
使用标记来确保唯一引用
判断方式
isset # 判断一个变量是否被定义
defined # 判断一个常量标示符是否被定义
function_exists # 判断一个函数是否被定义
class_exists # 判断一个类是否被定义
menthod_exists # 判读一个对象是否定义了指定的方法
property_ exists # 判断一个对象是否定义了指定的属性

只是不知道这个变量和常量哪个更好些

刚看到google整合了blogger

hello world!
打算为自己和同我有相同兴趣的人们开个工具箱
正巧看到了google整合了blogger
所以,呵呵
不废话,今天起将开始在这里建立我的web tools。
我是飞扬轻狂
一个普通的 web coding
现在主要使用 php
专注 FEED 相关的服务
这个地址的名字 飞扬轻狂的网络工具箱 或者 飞扬的WEB Tools
可以通过这个mail和我联系 fallseir[at]gmail.com
:)..